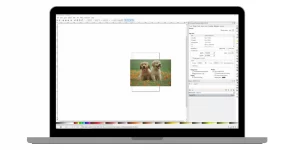
Resizing images without stretching or squishing them can be tricky, especially when you need them to stay clear and look great. Inkscape, a popular, free vector graphics editor, makes it easy to resize images proportionally with just a few clicks.
This guide walks you through simple, beginner-friendly steps to keep your image size and quality intact.
What is Proportional Resizing and Why is it Important?
When you resize an image proportionally, you adjust its width and height at the same time to keep its shape and look consistent. It prevents images from looking stretched, squished, or pixelated, which is especially important for web graphics, logos, and printed designs.
Which Tools in Inkscape are Best for Proportional Resizing?

In Inkscape, you have several options to resize images while keeping their proportions. Here’s a quick look at the most popular tools:
1. NS: Precise Resizing with Exact Measurements
The Transform Tool in Inkscape is perfect for users who want precise control over resizing an image. This tool allows you to input exact width and height values, making it ideal for projects that require specific dimensions.
Features and Details:
- Scale Proportionally: In the Transform dialog, you’ll find an option to “Scale Proportionally.” When checked, it automatically adjusts the height when you change the width (or vice versa) to keep the aspect ratio consistent.
- Numeric Input for Accuracy: Enter exact values for width or height. This feature is particularly helpful for designs where measurements must be precise, such as icons or graphics for printed materials.
- Accessible: You can find the Transform Tool under Object > Transform, making it easy to locate and use.
2. Selection Tool: Quick and Easy Proportional Resizing
The Selection Tool is Inkscape’s primary tool for fast resizing. This tool lets you click and drag to adjust the size of your image without going into menus, which is perfect for a quick edit.
Features and Details:
- Drag to Resize: With the Selection Tool, you can simply drag one of the image’s corners to resize it. This method is intuitive and saves time for simple adjustments.
- Lock Aspect Ratio: In the toolbar, a lock icon near the width and height fields allows you to maintain proportions easily. Click this lock, and the tool will ensure your image scales proportionally as you drag.
- Visible in the Main Toolbar: The Selection Tool icon is visible in the toolbar, making it highly accessible and easy to use without navigating multiple menus.
3. Keyboard Shortcuts: Fast, Accurate Resizing with Key Presses
Keyboard shortcuts offer a convenient way to resize images accurately without using menus or toolbars. This is ideal for users who are comfortable with shortcuts and want maximum efficiency.
Features and Details:
- Hold Ctrl for Proportional Resizing: While using the Selection Tool, holding down the Ctrl key keeps the image proportions locked as you resize. This shortcut is perfect for resizing quickly while maintaining the original aspect ratio.
- Keyboard Efficiency: Using shortcuts is often faster than menu navigation. This feature is great for users familiar with Inkscape who want to work more efficiently.
- No Menu Required: With keyboard shortcuts, you can resize and keep proportions without needing to open additional tools, making it a streamlined option for fast edits.
Step-by-Step Guide to Resize an Image Proportionally in Inkscape
Follow these steps to get the perfect size for your image without distortion.
1. Set Up Inkscape and Import Your Image
- Open Inkscape.
- Go to File > Import to add your image.
- Click on the image to make sure it’s selected before resizing.
2. Method 1: Resize Using the Transform Tool
- Select the image.
- Go to Object > Transform.
- In the Transform dialog, find the Scale tab.
- Check “Scale Proportionally” to lock the aspect ratio.
- Enter a new width or height. The other value will adjust automatically to maintain proportions.
- Click Apply.
3. Method 2: Resize with the Selection Tool and Lock Aspect Ratio
- Select the image.
- In the toolbar, find the lock icon (often located near the width and height boxes).
- Click the lock icon to keep the aspect ratio fixed.
- Now, drag the corners of the image to resize it proportionally.
4. Method 3: Resize Using Keyboard Shortcuts
- Select your image.
- Hold the Ctrl key while you drag a corner of the image.
- This shortcut ensures that the image maintains its proportions as you resize.
Which Units to Use for Resizing?
In Inkscape, you can resize images in different units like pixels (px), millimeters (mm), or centimeters (cm). Here’s how to choose:
- Pixels (px): Great for web graphics or online use.
- Millimeters (mm) or Centimeters (cm): Useful for printed designs where physical size matters.
To change the unit:
- Click the width or height box.
- Select your desired unit from the dropdown menu.
What to Do If Proportional Resizing Doesn’t Work?
If your image isn’t resizing properly, here’s how to troubleshoot:
- Distorted or Stretched Image: Double-check that the “Scale Proportionally” option is enabled.
- Blurry or Pixelated Image: This can happen if the image is resized too much. Try starting with a high-resolution version to avoid this issue.
Which Advanced Techniques Can Help with Precise Resizing?
For even more control, try these advanced techniques:
- Numeric Input: In the top toolbar, enter specific width or height values. Be sure the lock icon is selected to keep proportions.
- Combining with Rotation or Skew: Resize and then add other transformations like rotation to fit unique design needs.
Conclusion
Resizing images proportionally in Inkscape keeps them looking sharp and professional. You can use the Transform tool for exact measurements, the Selection tool for quick resizing, or keyboard shortcuts for flexibility. Give these methods a try, and you’ll be resizing images like a pro!

