How to Resize Your Image for a T-Shirt?

Creating a custom T-shirt design can be exciting, but getting the image size right can make a huge difference in print quality. If you’re wondering how to resize your image for a T-shirt, this guide covers everything from choosing the best dimensions to ensuring the image quality stays sharp. Whether you’re a beginner or a DIY enthusiast, follow these simple steps to make sure your design comes out perfectly.

Why Image Size Matters for T-Shirt Printing
Why Image Size Matters for T-Shirt Printing

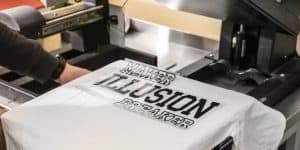
When it comes to T-shirts, the image size directly affects how sharp and clear the design appears on the fabric. If the image is too small, it may stretch and look pixelated. On the other hand, a too-large file may not fit properly on the T-shirt. Choosing the right size ensures the design is easy to read, has clean edges, and aligns with the fabric.

  • Quality: A well-sized image keeps your print looking professional.
  • Readability: Clear and correctly sized images make designs stand out.
  • Durability: Proper sizing helps avoid fading or pixelation over time.

Ideal Image Dimensions for T-Shirt Printing

For the best print quality, the typical T-shirt design space is between 10 to 14 inches wide and 12 to 18 inches tall. Here are a few quick pointers for sizing your design:

  • Front Design: Commonly around 12 inches wide by 14 inches tall.
  • Back Design: Often larger, around 13 inches wide by 16 inches tall.
  • Small Logos: For pocket-sized images or logos, 4 inches wide by 4 inches tall usually works well.

How to Choose the Right Image Format?

The type of file you choose impacts how well the image will resize. Some file formats hold up better than others for T-shirt printing.

  • PNG: Great for simple graphics with transparency.
  • JPEG: Good for colorful designs but can lose quality if resized too much.
  • Vector (SVG, AI): Ideal for resizing without losing quality. Vector files can be stretched to any size without looking blurry, making them perfect for large prints.

If you want a flexible design, use vector files (like SVG or AI) whenever possible.

Understanding Resolution and DPI

Understanding Resolution and DPI

Resolution is how detailed an image appears, and DPI (dots per inch) is a standard measure for printers. For T-shirt printing, a high DPI—usually 300 DPI—ensures the image prints clearly. Here’s why resolution matters:

  • Sharpness: Higher DPI images are less likely to look blurry.
  • Printing Quality: Printers need at least 300 DPI for sharp details.
  • Fit: A high-resolution image can be resized smaller without losing quality.

Step-by-Step Guide to Resizing Your Image

To resize your image, follow these simple steps using common software tools. Here’s how to do it with Photoshop, GIMP, and online resizing tools.

Using Photoshop

  1. Open the image file in Photoshop.
  2. Go to Image > Image Size.
  3. Set the resolution to 300 DPI.
  4. Adjust the dimensions to your preferred size (like 12 inches wide by 14 inches tall).
  5. Save as PNG or JPEG.

Using GIMP (Free Tool)

  1. Open the file in GIMP.
  2. Go to Image > Scale Image.
  3. Set DPI to 300.
  4. Enter desired dimensions in inches.
  5. Export as PNG or JPEG.

Using an Online Resizing Tool

  1. Upload your image to an online tool like Canva or Pixlr.
  2. Set the desired size and DPI if possible.
  3. Save in the appropriate file format (PNG or JPEG).

How to Keep Image Quality High After Resizing

When resizing an image, it’s essential to avoid losing quality. Here are a few tips:

  • Use Vector Files: These files scale better without losing clarity.
  • Don’t Upscale Too Much: Enlarging small images can lead to pixelation.
  • Check Resolution: Ensure the DPI stays at 300 for clear prints.
  • Use Preview Tools: Some software tools allow you to see how the design will look when printed on fabric.

Preview Your T-Shirt Design Before Printing

Previewing your T-shirt design can help catch mistakes before printing. Mockup generators like Placeit or Printful show how your design will appear on a T-shirt. Benefits of previewing include:

  • Spotting Errors: Catch alignment or sizing issues early.
  • Seeing Colors: Some colors look different on screen than in print.
  • Perfecting Placement: Adjust where the design sits on the T-shirt.

Best Tools and Tips for Resizing Your Image for a Perfect T-Shirt Print

Tools for Resizing T-Shirt Images

Resizing an image for T-shirt printing can be achieved through various tools, each tailored to different design needs and user experience levels.

1. Adobe Photoshop

Adobe Photoshop is a top choice for resizing images for T-shirt printing because it provides precise control over dimensions and resolution settings, which is crucial for high-quality prints. In Photoshop, you can easily set your image to 300 DPI (dots per inch)—the standard for clear, professional printing on fabric.

The software also supports high-quality file formats like PNG and vector files, both ideal for preserving clarity in resized images. To resize, simply go to Image > Image Size to adjust width, height, and DPI. Photoshop is best suited for users comfortable with detailed editing and aiming for top-notch print quality.

2. GIMP

GIMP (GNU Image Manipulation Program) is a free, open-source alternative to Photoshop that offers similar image resizing capabilities, making it an excellent choice for budget-conscious users. With GIMP, you can set a 300 DPI resolution and adjust dimensions accurately, which is essential for achieving high-quality T-shirt prints.

GIMP supports various file formats, including PNG and JPEG, and is ideal for beginners and intermediate users looking to create sharp, clear images. To resize, go to Image > Scale Image and set the desired dimensions and DPI.

3. Canva

Canva is a user-friendly online design tool ideal for quick and easy resizing. It’s perfect for those new to design, providing a simple drag-and-drop interface for adjusting image dimensions without the need for advanced editing skills. Although Canva lacks the detailed control of Photoshop and GIMP, it allows users to create and resize T-shirt designs at standard dimensions, making it a good option for basic designs.

Canva supports PNG and JPEG formats, and resizing is done by selecting the “Resize” option and entering the required dimensions, keeping things efficient and straightforward.

4. Pixlr

Pixlr is an accessible online editor that works directly in your browser, making it a convenient choice for quick resizing tasks. With essential resizing features, Pixlr allows users to adjust image width, height, and DPI settings, though it may lack some of the advanced controls found in Photoshop or GIMP. Pixlr is ideal for users who need a quick solution for resizing T-shirt images without downloading software.

The tool supports standard file formats like PNG and JPEG, and resizing can be done by choosing the “Image Size” option within the editor. This makes Pixlr a practical option for straightforward, quick edits.

Common Mistakes to Avoid When Resizing

Avoid these common pitfalls when resizing your image for a T-shirt to ensure a high-quality print:

  • Using Low-Resolution Images: Low-res images often appear blurry or pixelated on fabric, leading to an unprofessional look. Start with a high-resolution image for the best results.
  • Incorrect DPI Settings: For clear and crisp prints, aim for a 300 DPI setting. Lower DPI values may reduce print quality and make the image appear less sharp.
  • Upscaling Small Files: Enlarging small images can lead to pixelation. Instead, begin with a large, high-resolution file so resizing doesn’t reduce quality.
  • Wrong File Format: Choose flexible formats like PNG or vector files (such as SVG) to preserve image clarity and detail. These formats are better suited for resizing without compromising quality.

By avoiding these common mistakes, you’ll create a T-shirt design that looks professional, clear, and sharp when printed.

Conclusion

Resizing your image for a T-shirt is easy once you know the basics. Just remember to choose the right dimensions, set the resolution to 300 DPI, and save in a suitable file format. With these tips, you can create a design that looks great on any T-shirt.

FAQs: Image Resizing for T-Shirt Printing

Here are some quick answers to common questions about resizing images for T-shirts:

  • What size should my image be for a T-shirt?
    A typical size is around 12 x 14 inches for the front.
  • What DPI is best?
    300 DPI is recommended for high-quality prints.
  • What file format works best?
    PNG or vector files are ideal.