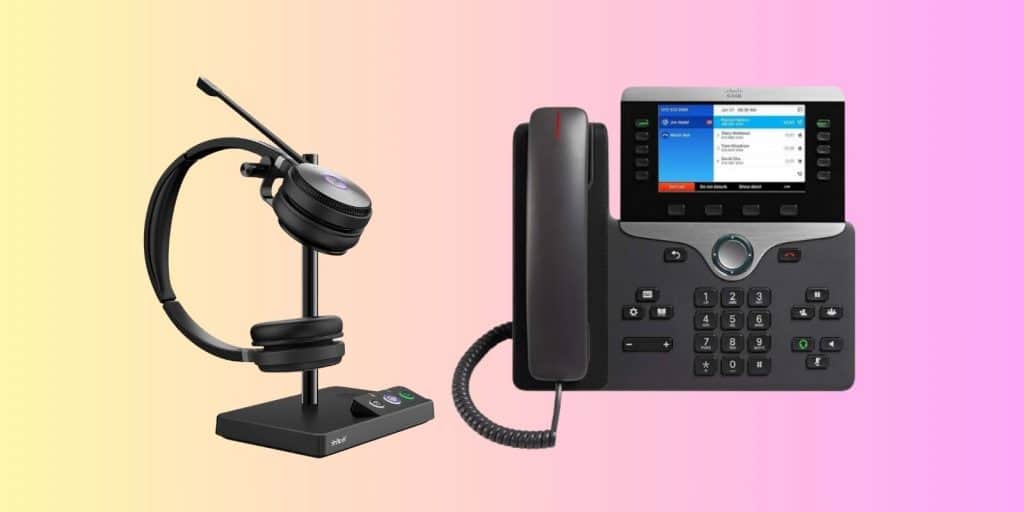
Yealink wireless headsets offer flexibility, comfort, and ease of use, making them an excellent choice for business professionals who need to stay connected while moving around. If you’re using a Cisco phone and want to set up a Yealink wireless headset, this guide will walk you through the process. By following these steps, you can ensure a smooth and efficient connection between your Yealink headset and Cisco phone, improving your communication experience.
Why Use a Wireless Headset with a Cisco Phone?

Using a wireless headset with your Cisco phone has several advantages:
- Hands-Free Communication: You can make calls while performing other tasks, improving productivity.
- Mobility: Walk around freely without being tethered to the desk.
- Comfort: Yealink wireless headsets are designed to reduce neck and shoulder strain, offering a more comfortable alternative to traditional wired headsets.
- Enhanced Audio: Yealink headsets provide superior sound quality, ensuring clear conversations.
Step-by-Step Guide to Set Up Yealink Wireless Headset to a Cisco Phone
Follow these simple steps in our step-by-step guide to set up your Yealink wireless headset with a Cisco phone.
Step 1: Check Compatibility
Before connecting a Yealink wireless headset to a Cisco phone, it’s essential to check if the devices are compatible. Most Cisco IP phones, such as the 8800 series or 7800 series, are compatible with Yealink wireless headsets, but some configurations may require additional accessories like an Electronic Hook Switch (EHS) cable.
Compatible Cisco Phone Models:
- Cisco 8800 Series
- Cisco 7800 Series
- Cisco 6800 Series
- Cisco 7900 Series (requires additional adapters)
Yealink Wireless Headset Models:
- Yealink WH66
- Yealink WH67
- Yealink WH62
Step 2: Set Up the Yealink Wireless Headset
Before setting up the headset, ensure that it is fully charged. A charged headset ensures a stable connection and optimal performance during use.
The Yealink wireless headset comes with a base station that acts as the interface between your Cisco phone and headset. Make sure the base station is plugged into a power source.
- Yealink Base Station Connection: Plug the Yealink headset base station into an electrical outlet and ensure it is powered on.
Step 3: Connect the Yealink Headset to the Cisco Phone
There are two primary methods to connect the Yealink wireless headset to your Cisco phone: using the RJ-9 headset port or via an Electronic Hook Switch (EHS) cable.
Option 1: Connecting via RJ-9 Headset Port
- Locate the Headset Port: On your Cisco phone, locate the RJ-9 headset port. It’s typically located on the side or back of the phone.
- Plug in the Headset: Use the RJ-9 cable (often included with the Yealink headset) and plug it into the headset port on the Cisco phone.
- Select the Audio Device on the Cisco Phone:
- Press the Settings button on your Cisco phone.
- Navigate to Preferences or Audio Settings.
- Select Headset from the audio output options to route the call audio through the headset.
- Test the Setup: Pick up the headset, press the call button, and make a test call to ensure everything works as expected.
Option 2: Connecting via EHS Cable (For Wireless Base Station)
For models like the Yealink WH66 or WH67, you’ll need an EHS cable to allow your headset to interact with the Cisco phone wirelessly.
- Connect the EHS Cable:
- Plug one end of the EHS cable into the headset port of the Cisco phone (typically located on the back or side).
- Connect the other end to the Yealink wireless base station.
- Enable EHS Mode on the Cisco Phone:
- Go to Settings > Preferences on your Cisco phone.
- Navigate to Audio Settings and enable EHS.
- This setting allows the Yealink wireless headset to answer and end calls automatically when the headset button is pressed.
- Pair the Headset: Ensure that the Yealink headset is paired with the base station. Follow the pairing instructions in the Yealink headset’s user manual to complete this step.
Step 4: Configure Audio Settings for Optimal Use
Once your Yealink wireless headset is connected to your Cisco phone, you may want to configure the audio settings for better sound quality:
- Adjust the Call Volume: Use the volume buttons on the Cisco phone or the Yealink headset to adjust the audio level. If you prefer, you can adjust the volume directly from the headset itself.
- Set the Microphone Sensitivity: Depending on the environment (e.g., if there’s a lot of background noise), you may need to adjust the microphone sensitivity on the headset or through the Cisco phone settings.
- Enable Noise Cancellation: Yealink wireless headsets come with noise-canceling microphones. Ensure this feature is enabled to reduce background noise during calls.
Step 5: Test the Yealink Wireless Headset
After the connection is complete, make a test call to check the headset’s functionality:
- Make a Call: Use the Yealink wireless headset to dial a number and verify that the call audio comes through the headset.
- End the Call: Press the headset’s call control button to end the call. If you’re using EHS, this should automatically hang up the call.
If everything works as expected, you have successfully set up your Yealink wireless headset with your Cisco phone.
Troubleshooting Common Issues
While setting up your Yealink wireless headset to a Cisco phone is usually straightforward, here are some common issues you may encounter:
1. No Sound in the Headset
- Solution: Check the audio settings on the Cisco phone and ensure the headset is selected as the default output device. Also, check if the headset is powered on.
2. Headset Not Pairing
- Solution: Ensure the headset and base station are properly paired. Follow the pairing instructions in the Yealink manual, ensuring the base station is in pairing mode.
3. EHS Not Working
- Solution: Make sure the EHS cable is connected correctly and the EHS feature is enabled in the Cisco phone’s settings.
4. Poor Call Quality
- Solution: Adjust the microphone sensitivity and volume. Ensure that there are no obstructions affecting the wireless signal, and that the headset is within range of the base station.
Conclusion
Setting up a Yealink wireless headset with a Cisco phone is a simple process, but it requires the right connections and configurations. By following the steps outlined above, you can enjoy the benefits of hands-free communication, increased mobility, and improved sound quality. Whether you’re using the RJ-9 headset port or the EHS cable with a wireless base station, the setup process is manageable and effective for most Cisco phones.
If you encounter any issues during setup, refer to the troubleshooting section for quick solutions. With the right setup, your Yealink wireless headset will provide reliable, high-quality audio, helping you stay connected while improving productivity.
If you have any questions or need additional help, feel free to leave a comment below!

